TimewiseCat has an “event timer” function, a “message card creation” function, and an “event widget display” function.
When the day of this long-awaited event arrives, we will celebrate in style!
■Event timer function
When you start the app, the home screen will be displayed. There is a message card icon in the top right of the home screen. Tapping this will take you to the “Message Card” screen.
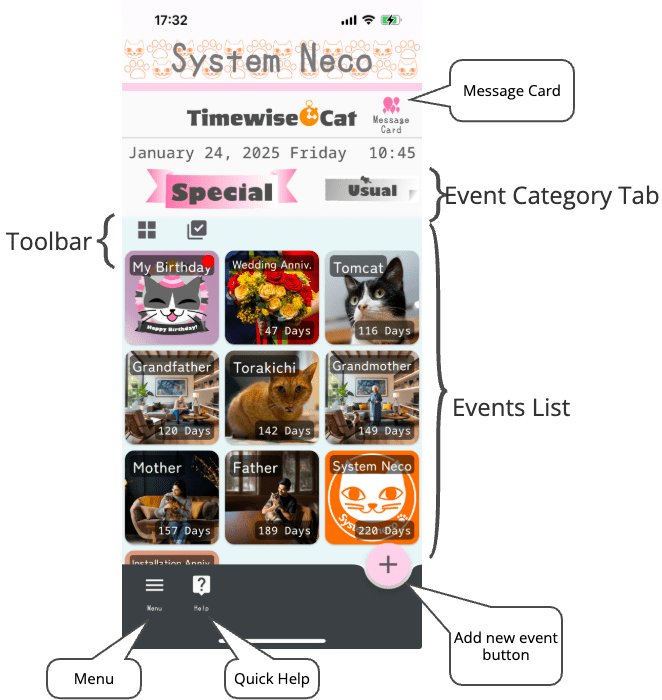
1. Event Categories
There are event category tabs under the date and time at the top of the screen. Selecting the event category tab will determine whether to display a list of timers for “special events” or “regular events.”
There are two categories of event timers: “Special Events” and “Usual Events”.
1.1 Special Events
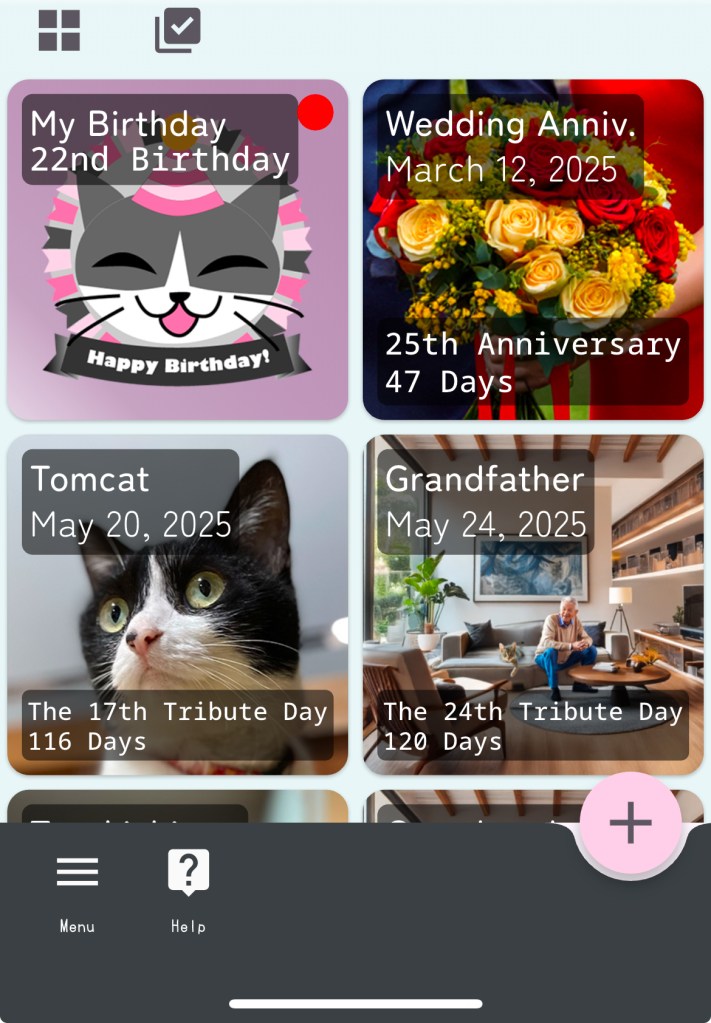
In “Special Events” you can add event timers such as “Adoptaversary” ,”Birthday,” “Anniversary” and “Schedule”.
・”Adoptaversary” Timer
Register the date of adoption and the birthday of your pet, and display it as “the xxth anniversary of my pet’s birth” or “the xxth birthday.” It is automatically updated every year.
・”Birthday” Timer
Every year, we count down to one’s birthday and display “XXth birthday.”
・”Anniversary” Timer
If you register your wedding anniversary or founding anniversary, it will be counted down every year as the “xxth anniversary.”
・”Schedule” Timer
You can count down to the due date. You can also count down by the minute.
・Memorial Mode
If you enter “Date of farewell” in addition to the birthday input field, it will change to display something like “XXth year of birth” or “XXth memorial day.”
1.2 Usual Events
In “Usual Events,” you can register events such as “Annual Events,” “Monthly Events,” and “Scheduled Dates.”ます。
・”Anual Event” Timer
Count down annual events by specifying the month and date, such as a New Year’s countdown.
・”Monthly Event” Timer
Set the end of the month or a specific date and count down to your monthly schedule. Perfect for “payment dates” and “paydays.” By linking with the holiday calendar, you can automatically change the event date to the day before or after a holiday if it overlaps with a holiday.
2. Toolbar
You can perform bulk operations on the event list by tapping the icons on the toolbar.
2.1 List display size switching
Tap the resize  icon to switch the event list between large, medium and small sizes.
2.2 Selection mode switching
When you tap the selection mode switch  icon, a check box will appear next to the event in the list, and you can select the event by tapping the check box.
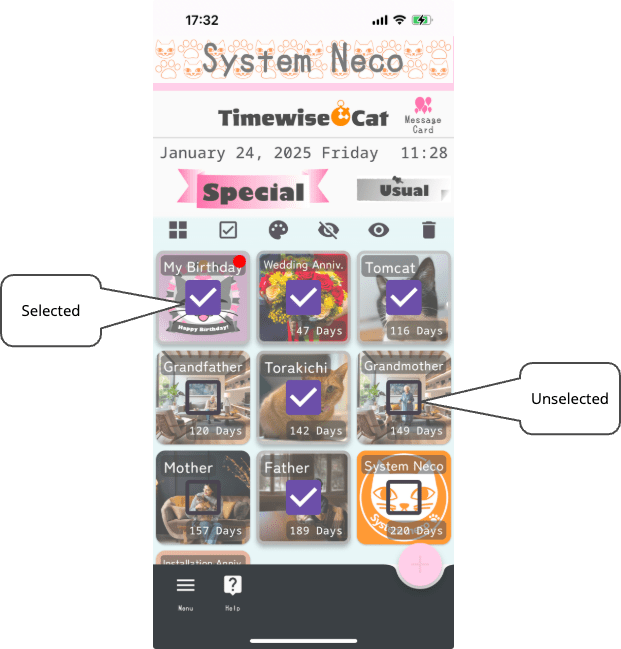
In selection mode, you can perform operations on selected event timers all at once.
When you are in selection mode screen, tapping the resize icon will cancel selection mode.
Tapping the Select All  icon will select all events. When all events are selected, the Select All icon will change to the Deselect All □icon. Tapping the Deselect All icon will deselect all selections.
Tapping the background color  icon will allow you to change the background color of all events at once. However, this will not have any effect on events with photos set.
You can change the visibility of all events at once with the Show /Hide
/Hide icon. If you hide an event, it will no longer be displayed in the list. This does not mean that it has been deleted. To delete an event, tap the Delete
  icon.
icon.
3. Events List
If there are many events registered in the event list, you can scroll by swiping up and down. You can also switch event categories by swiping left and right.
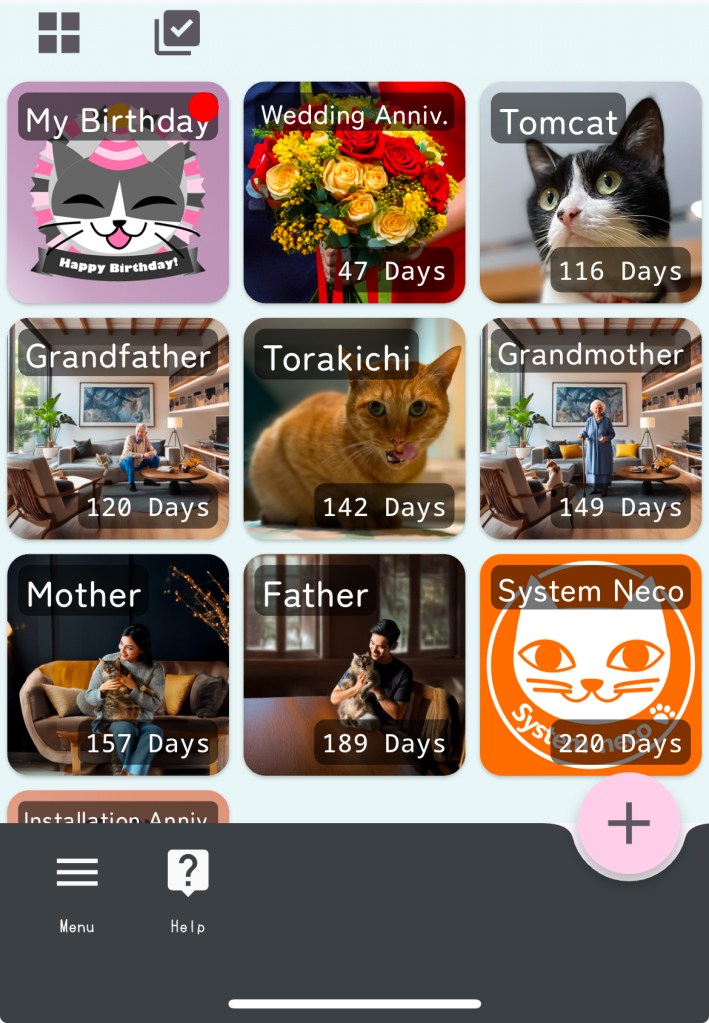
3.1 Event display size
The event display size can be switched between three levels: large, medium, and small.

3.2 Adding a new event
You can add various event timers by tapping the Add New Event  button. However, the events that can be selected when adding a new event are limited to events in the currently selected event category.
■Message card creation function
Tapping the message card icon in the upper right corner of the home screen will take you to the “Message Card” screen.
On the message card screen, you can create animated images for your congratulatory messages and upload them to social media using the sharing function.
The animations that can be combined include “balloons,” “confetti,” “fireworks,” “orbs,” “spotlights,” and “stars.” Create videos for congratulatory messages by combining photos and videos with animations.

1. Create videos with pre-defined cards
When you tap the  icon, the card selection screen will appear. If you do not want to use a photo or video, you can use it as a card mount for a message card.用出来ます。
2. Create videos using photos
Tap the camera or photo
 icon to import a photo. The imported photo will be combined with animation to create a celebratory video.ます。
3. Create a video using video
Tap the video recording or video
 icon to import a video. Add animation to the imported video to create a celebratory video.
4. Sharing Features
Tapping the share  icon in the top right corner of the screen will bring up the iOS sharing options screen, allowing you to upload your video to social media or save it.d to SNS.
■Event widget display function
You can display multiple events as widgets on your smartphone’s home screen.
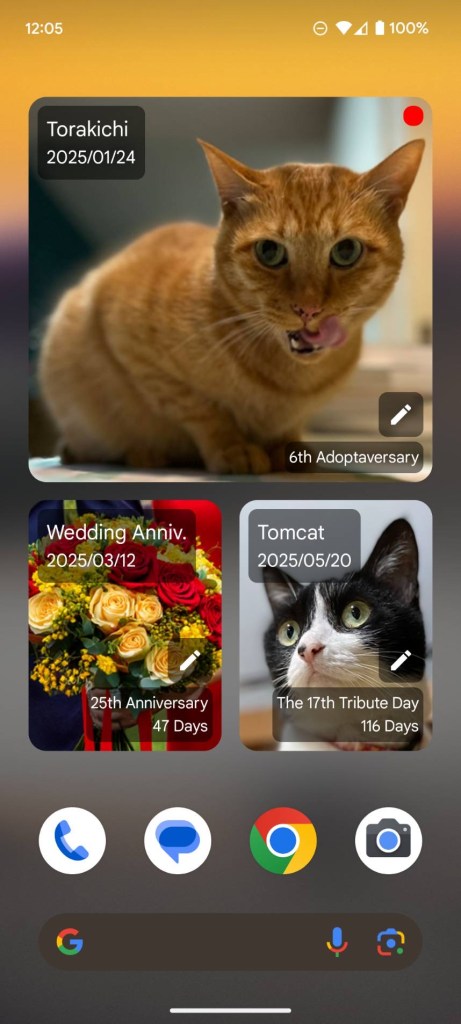
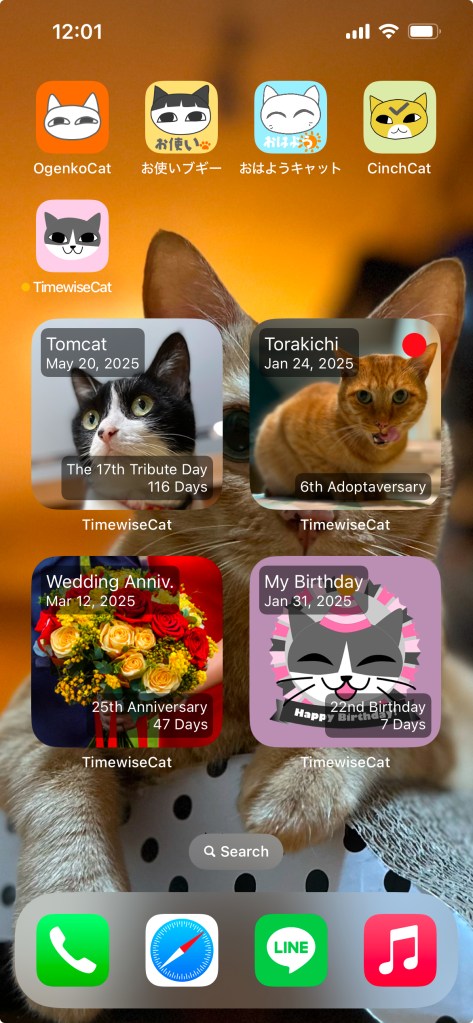
Tapping the widget will launch the “Meow Day Timer.” A red circle ● will appear in the upper right corner of the widget if it is the day of an event. Tapping the widget with a ● will launch the “Meow Day Timer” and a grand celebration screen will be displayed.
The method for displaying widgets on your smartphone screen will differ depending on the smartphone you are using. If you are using an Android device, please refer to here. If you are using an iPhone, please refer to here. If you are using an iPad, please refer to here.
The process for selecting the events you want to display on the widget differs between Android and iOS (iPhone, iPad).
1. How to edit on Android
If your device’s OS is Android, tapping the edit  icon displayed on the widget will display the “Select an event” screen.
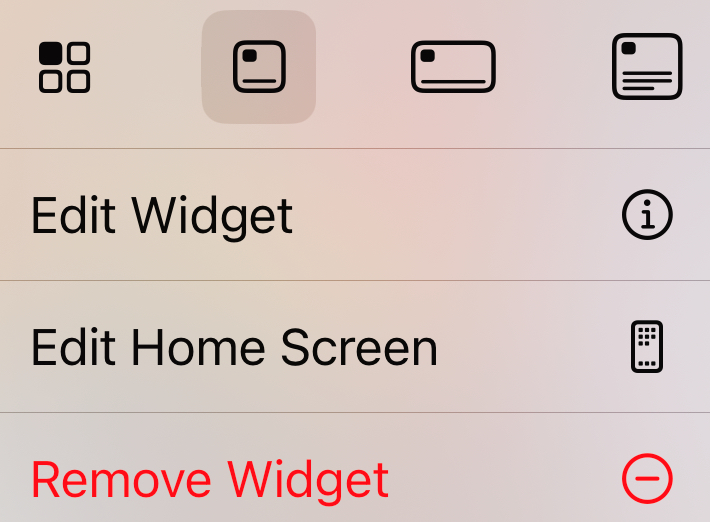
2. How to edit on iOS
If you are using an iPhone or iPad, press and hold the widget to display the pop-up menu, then select “Edit Widget.”
On both Android and iOS devices, if you select “Upcoming Events” at the top of the “Select an Event” screen, the event with the nearest event date will automatically be displayed.
