First, load the photos, PDFs, text files, web pages, etc. you want to add checkmarks to as a check sheet.
Once loaded, tap it to add a check mark. Once you finish adding checkmarks, you are finished.
■How to read the check sheet
When you start the app, the home screen will be displayed. At the top of the home screen, there are icons for loading checklists (photos, PDFs, text files, web pages, etc.). A list of loaded check sheets is displayed in the center of the home screen.
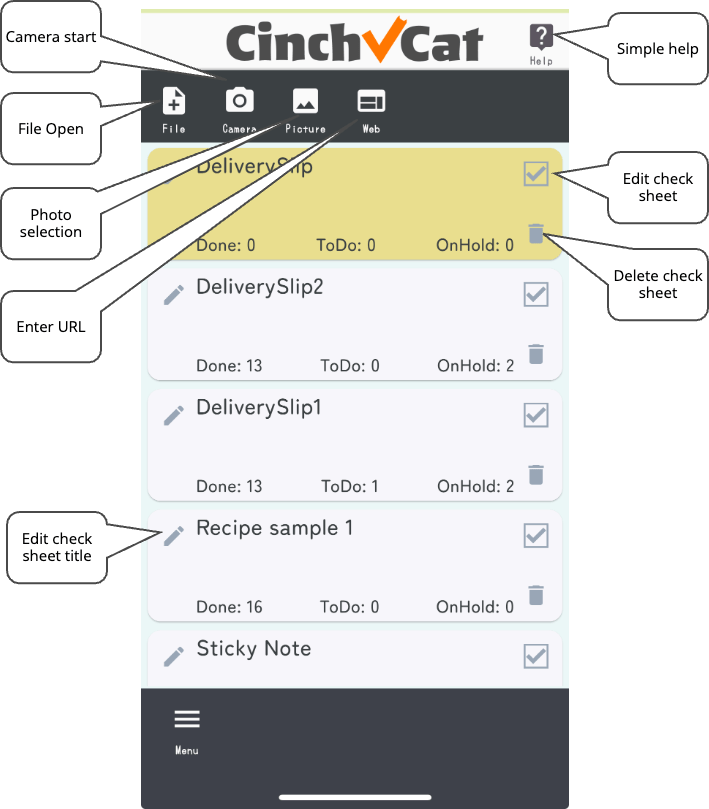
【File】
Tap the file icon to display the file selection screen. Files with extensions JPG, PDF, PNG, and TXT can be read.
【Camera】
Tap the camera icon to start the camera. Take a picture of the item you want to add a check mark to and load it.
【Picture】
Tap the photo icon to select and load one photo from your smartphone’s photo library.
【Web】
When you tap the web icon, a URL entry screen will be displayed, so enter the URL of the website you want to load.
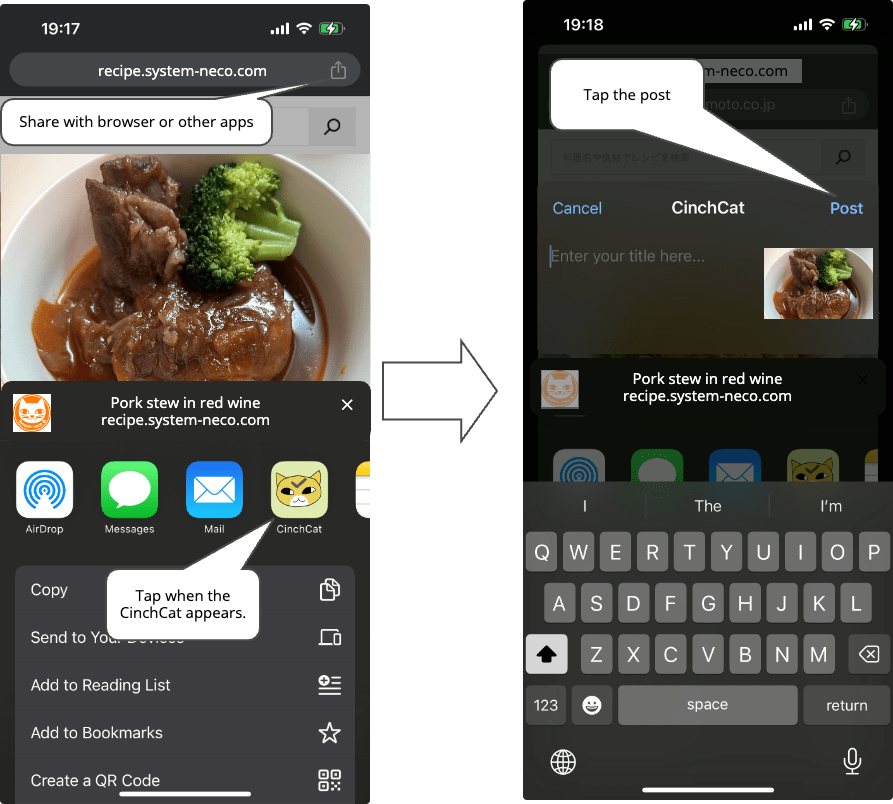
【Share from other apps】
You can also post to “CinchCat” using the sharing function of other apps (browser, recipe app, etc.).
■Put a check mark
Tap the selected check sheet in the list on the home screen again or tap the icon to switch to the “Check Sheet” screen.
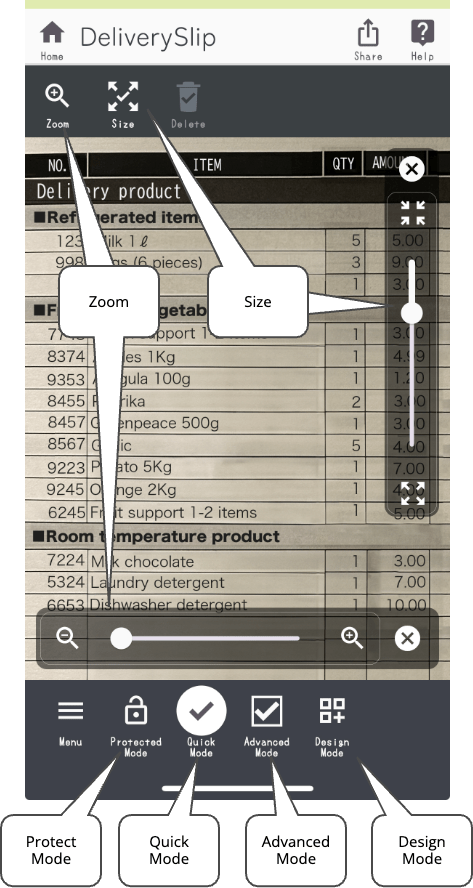
There are four modes on the check sheet screen: “Protect Mode“, “Quick Mode“, “Advanced Mode“, and “Design Mode“.
【Protected Mode】
Editing is not possible in protected mode. Once you have added the check mark, set it to protected mode. If you set it to protected mode, the contents will not be changed inadvertently.
Zoom slider
In protected mode, zoom operations are possible. You can enlarge/reduce the screen. Tap the zoom icon to display the zoom slider. Slide the slider left or right to zoom in or out of the screen.
【Quick Mode】
When you open the check sheet for the first time, it will be displayed in quick mode. When you tap the screen in quick mode, a check mark will be placed where you tapped. Tap the checkmark again to remove it.
If you want to change the size of the checkmark, tap the size icon to display the size slider. Slide the slider up or down to adjust the size.
Change size by long tap on the right edge
You can change the checkmark size by long-tapping the right edge of the checkmark and sliding it.
Move by long tap from the left edge to the center
You can move the checkmark position by long-tapping and sliding from the left side of the checkmark to the center.
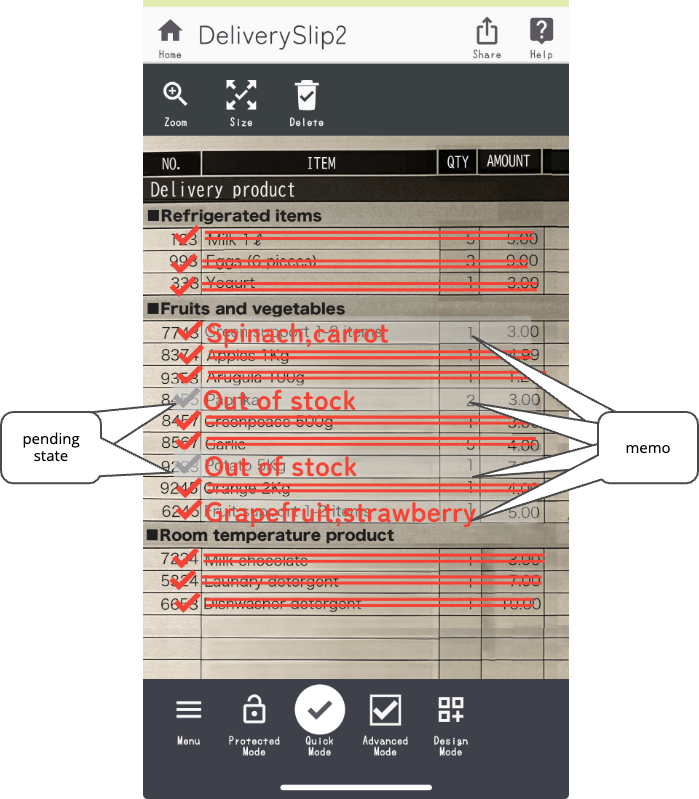
Display strikethrough
If you tap and hold the outside right side of the check mark, a strikethrough line will be drawn to the position where you tapped and held. You can adjust the length of the line by long-tapping and sliding left or right. If the long tap is close enough to overlap the check mark, it will be a size change operation, so you need to long tap at a sufficient distance.
Additional Information
By double-tapping the checkmark or strikethrough, you can enter “memo” as “additional information” or put it on hold.
If you put it on hold, the number of items will be displayed as ‘on hold‘ in the check sheet list on the home screen.
【Advanced Mode】
In advanced mode, when you tap the screen, a checkmark will appear where you tapped, and when you tap again, the checkmark will disappear and a frame will remain. Tap the frame to add a check mark again. To delete a frame, tap and hold while it is in the frame. This point is different from quick mode.
When the check mark is off (only the frame is displayed), the number of items will be displayed as “ToDo” in the check sheet list on the home screen.
Please note that long tapping while a check mark is displayed will result in a “resize” or “move” operation.
Other operations are no different from quick mode.
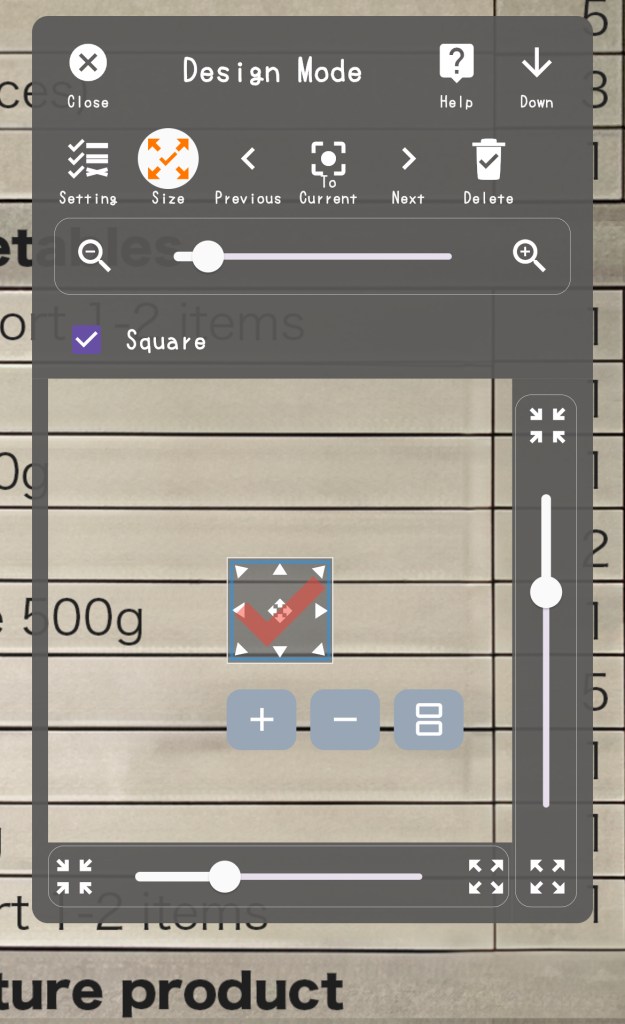
【Design Mode】
In design mode, you can change the type, size, and placement of checkmarks. Operations such as turning on/off check marks cannot be performed.